BeatCore Documentation
Setup and management guide for your beat store.
Requirements
Verify your hosting meets all of these before uploading files.
Most shared hosting plans meet all requirements. If unsure, ask your host whether PHP 8.2 and MySQL are available.
Installation
Before running the installer, create a MySQL database. This is the only manual step.
1. Create a MySQL database in cPanel
mystore_db).2. Upload and run
public_html via cPanel File Manager or FTP.https://yourdomain.com/install.php — the wizard starts automatically.Setup Wizard
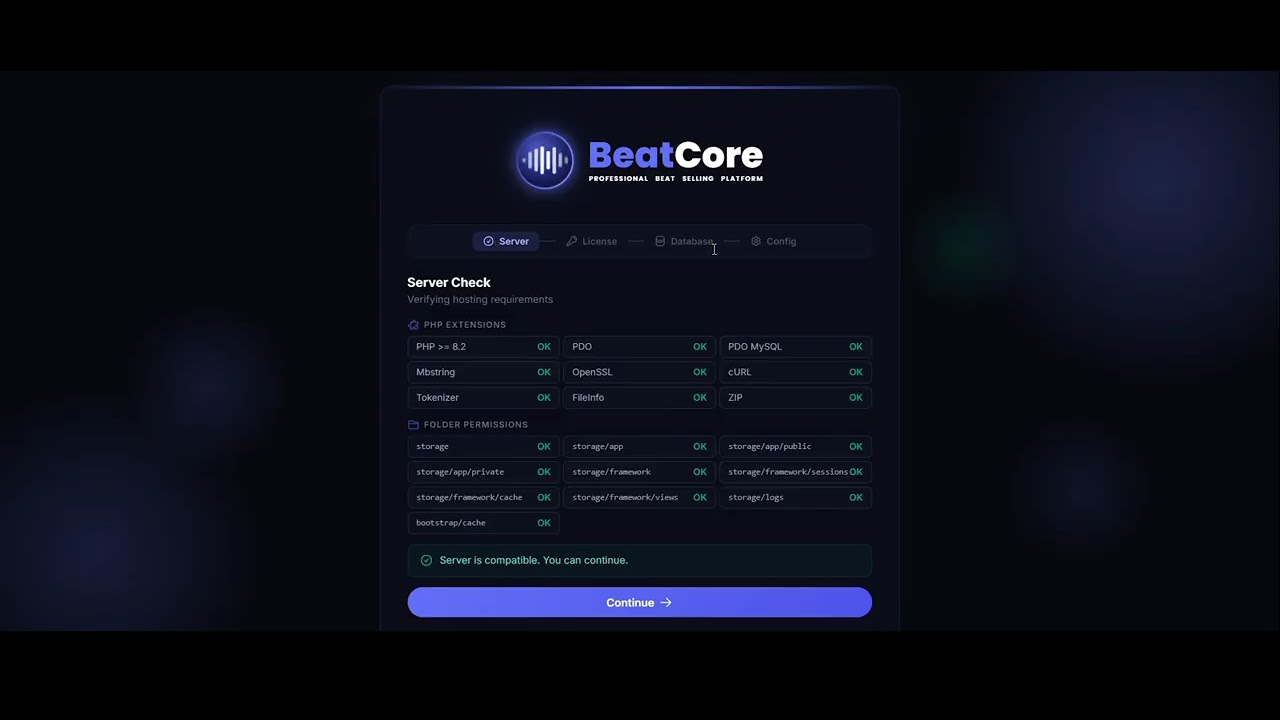
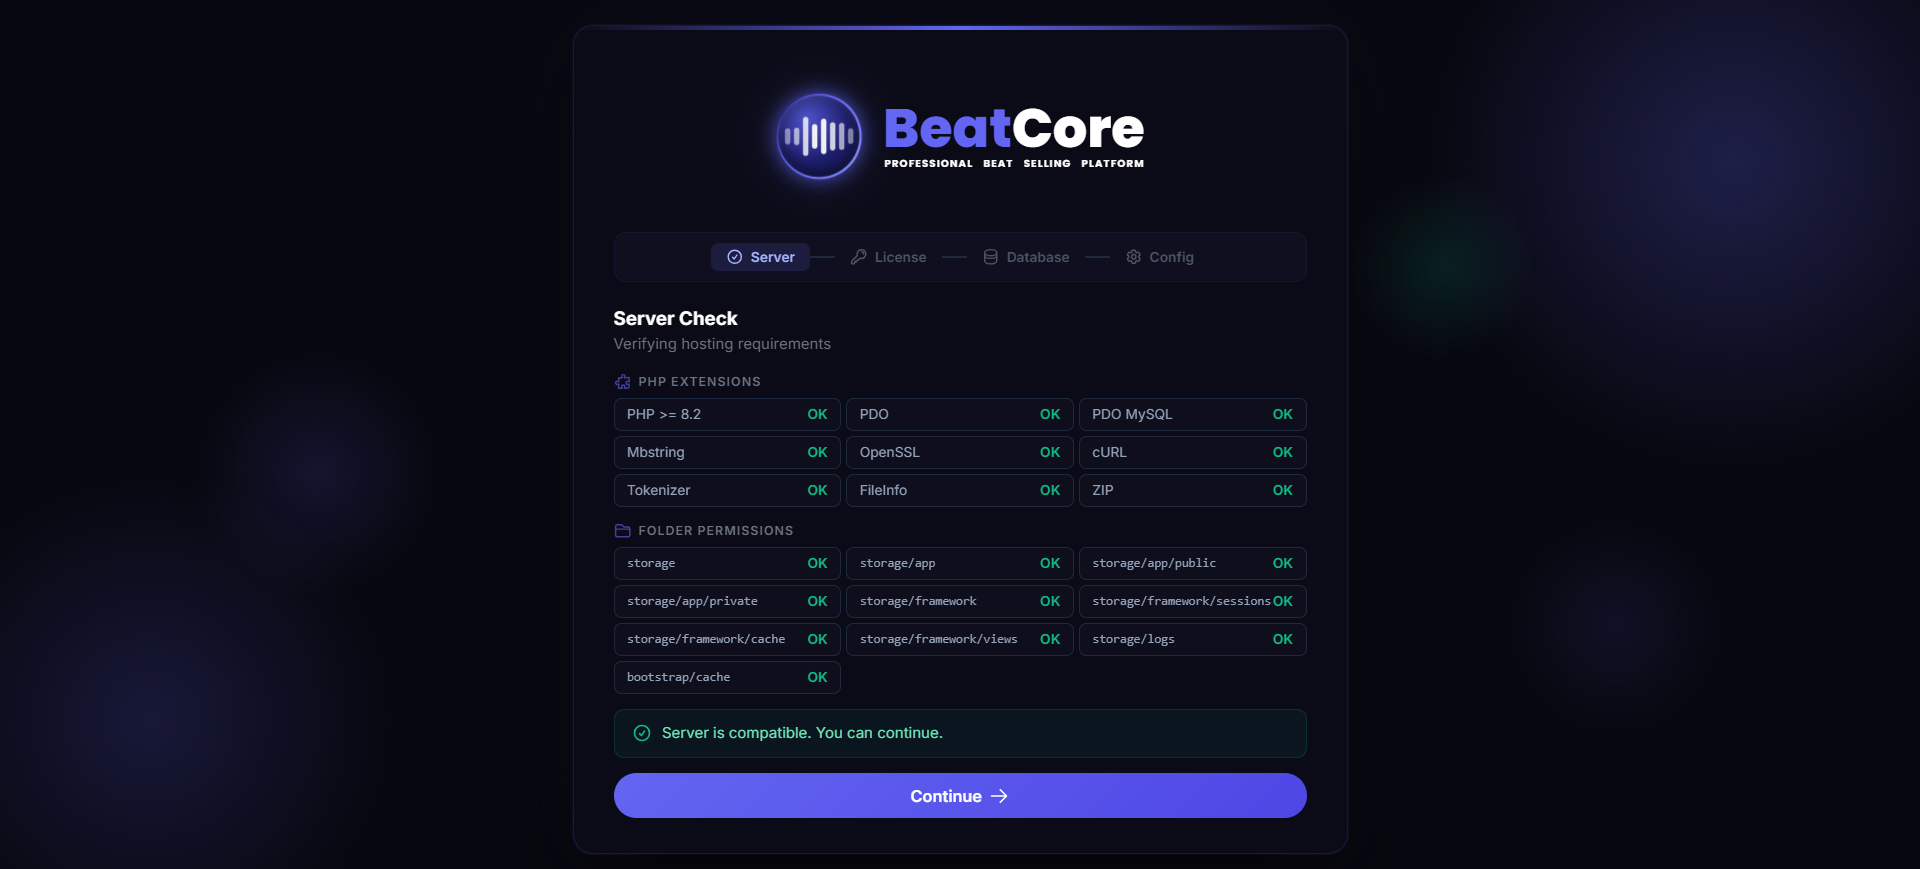
The wizard runs at /install.php and completes in under 2 minutes. It guides you through 4 sequential steps.
storage/ and bootstrap/cache/. No input needed — all checks must be green before you can proceed.xxxxxxxx-xxxx-xxxx-xxxx-xxxxxxxxxxxx). The installer contacts the BeatCore license server to activate the license for your domain. One code binds to one domain — to move it, deactivate it first from Admin → License.localhost), Port (default 3306), Database name, Username, and Password. The installer creates the database if it doesn’t exist, then tests the connection before proceeding..env, imports the full production SQL schema (default licenses, payment methods, genres, and FAQs), creates an install lock file, permanently removes install.php, and redirects you to /admin.When the wizard finishes, it removes install.php automatically. You are redirected directly to the admin panel.
Email / SMTP
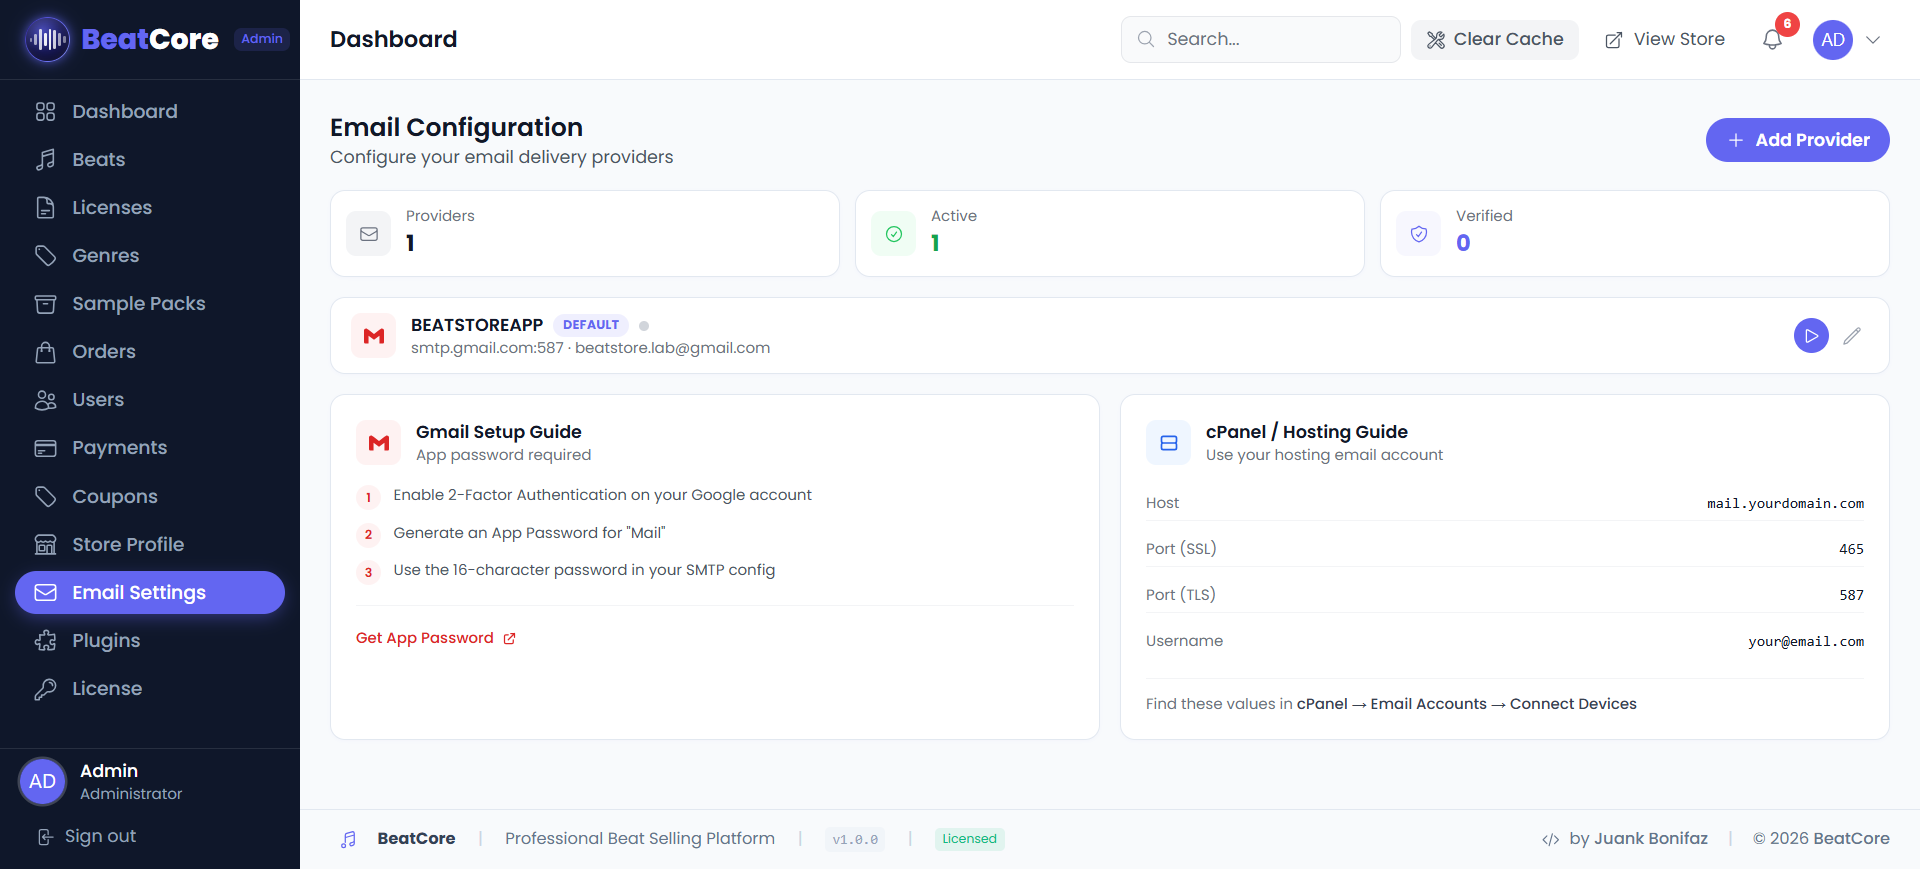
BeatCore sends purchase receipts, password resets, and notifications via email. Go to Admin Panel → Email / SMTP to configure your mail provider.
Admin Panel → Email / SMTP
Recommended: Gmail
myaccount.google.com/security and enable 2-Step Verification.smtp.gmail.com, Port: 587, Encryption: TLS, Username: your Gmail address, Password: the 16-char app password.| Provider | Host | Port | Encryption |
|---|---|---|---|
| Gmail | smtp.gmail.com | 587 | TLS |
| Outlook | smtp-mail.outlook.com | 587 | TLS |
| SendGrid | smtp.sendgrid.net | 587 | TLS |
| cPanel Mail | your domain | 465 | SSL |
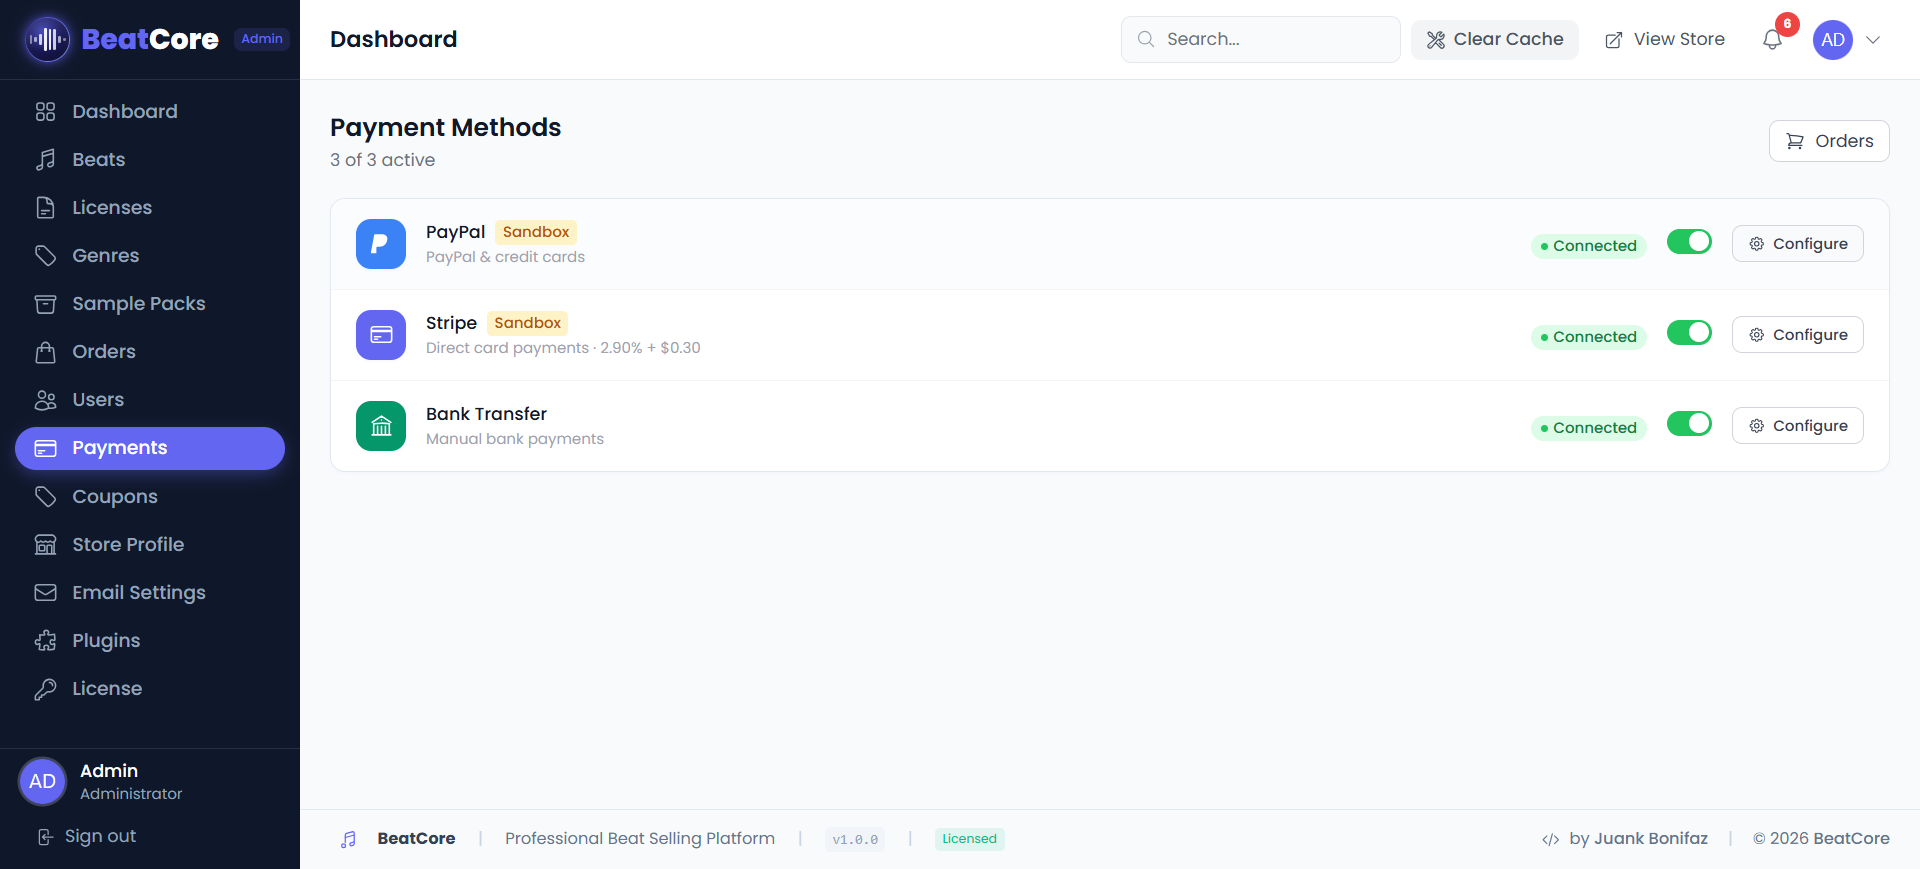
Payment Gateways
Admin Panel → Payments. You can enable multiple gateways simultaneously.
PayPal
Get your keys at developer.paypal.com → My Apps & Credentials → Create App.
https://yourdomain.com/webhooks/paypalStripe
Get your keys at dashboard.stripe.com → Developers → API keys.
pk_live_ — safe to expose on the frontendsk_live_ — keep private, used server-side onlyhttps://yourdomain.com/webhooks/stripeBank Transfer
No API keys needed. Enter your bank account details — they are shown to the customer at checkout. Orders must be approved manually after you confirm the payment.
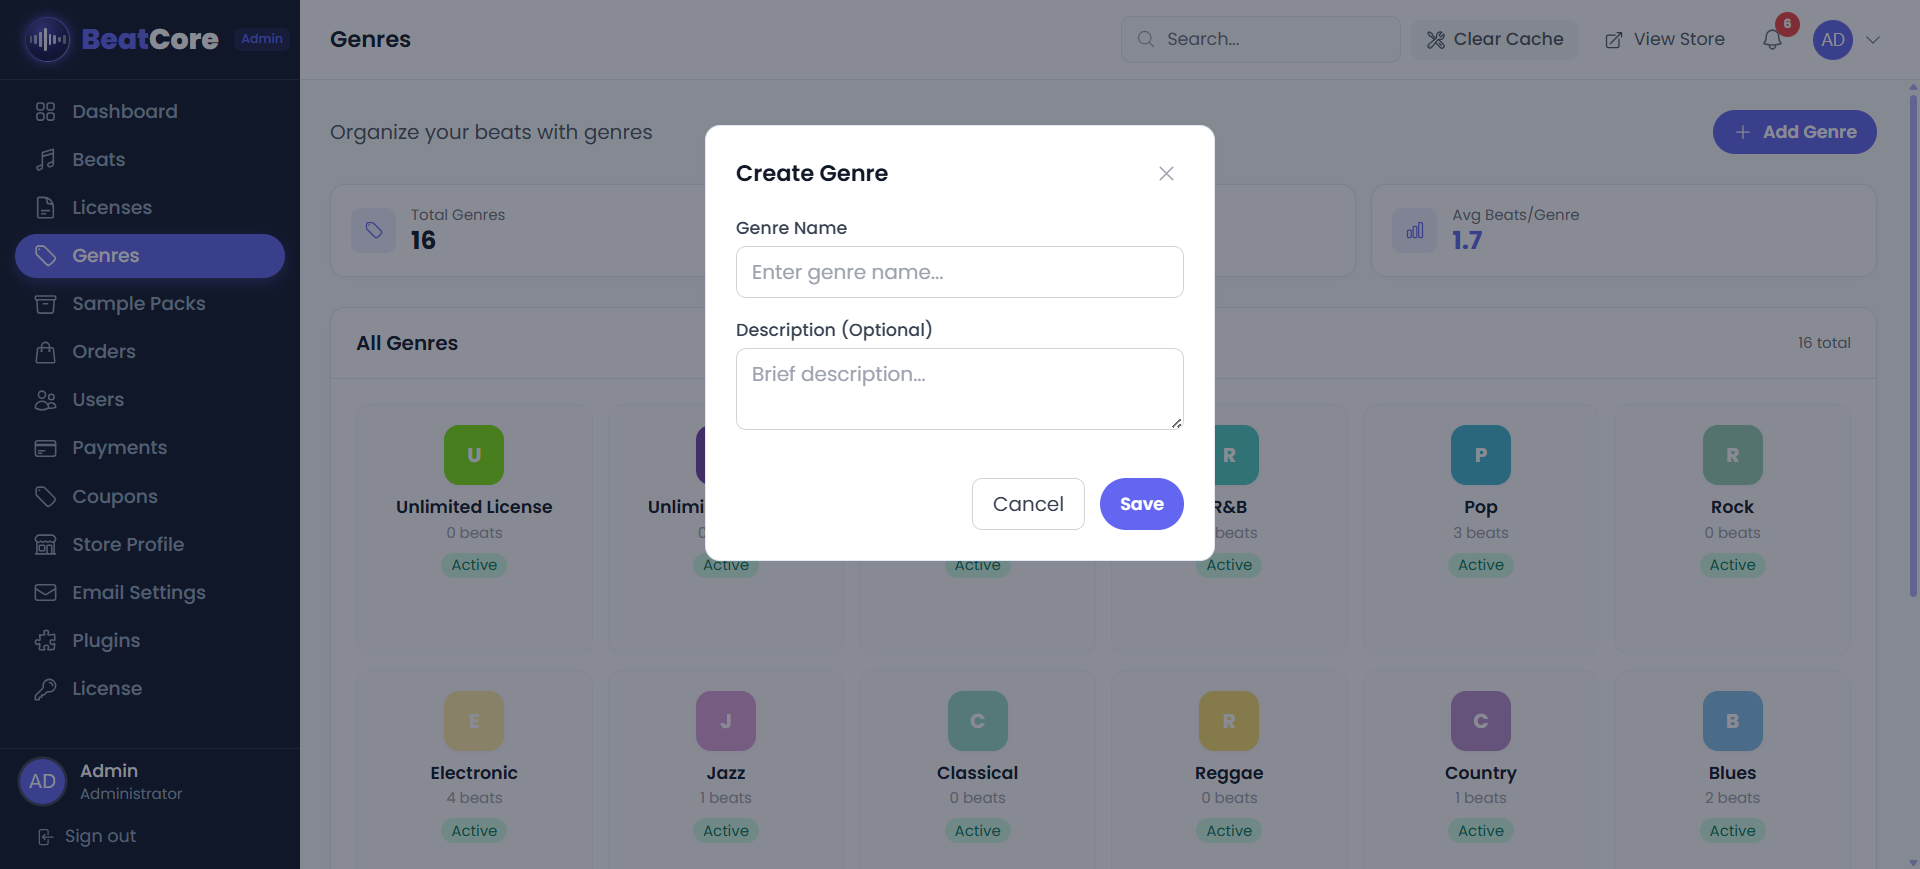
Genres
Genres are the music categories that customers use to filter beats in your store. Admin Panel → Genres
BeatCore includes 10 default genres: Hip Hop, Trap, R&B, Pop, EDM, Drill, Lo-Fi, Afrobeat, Latin, Reggaeton. You can edit, delete, or add more at any time.
Create a genre
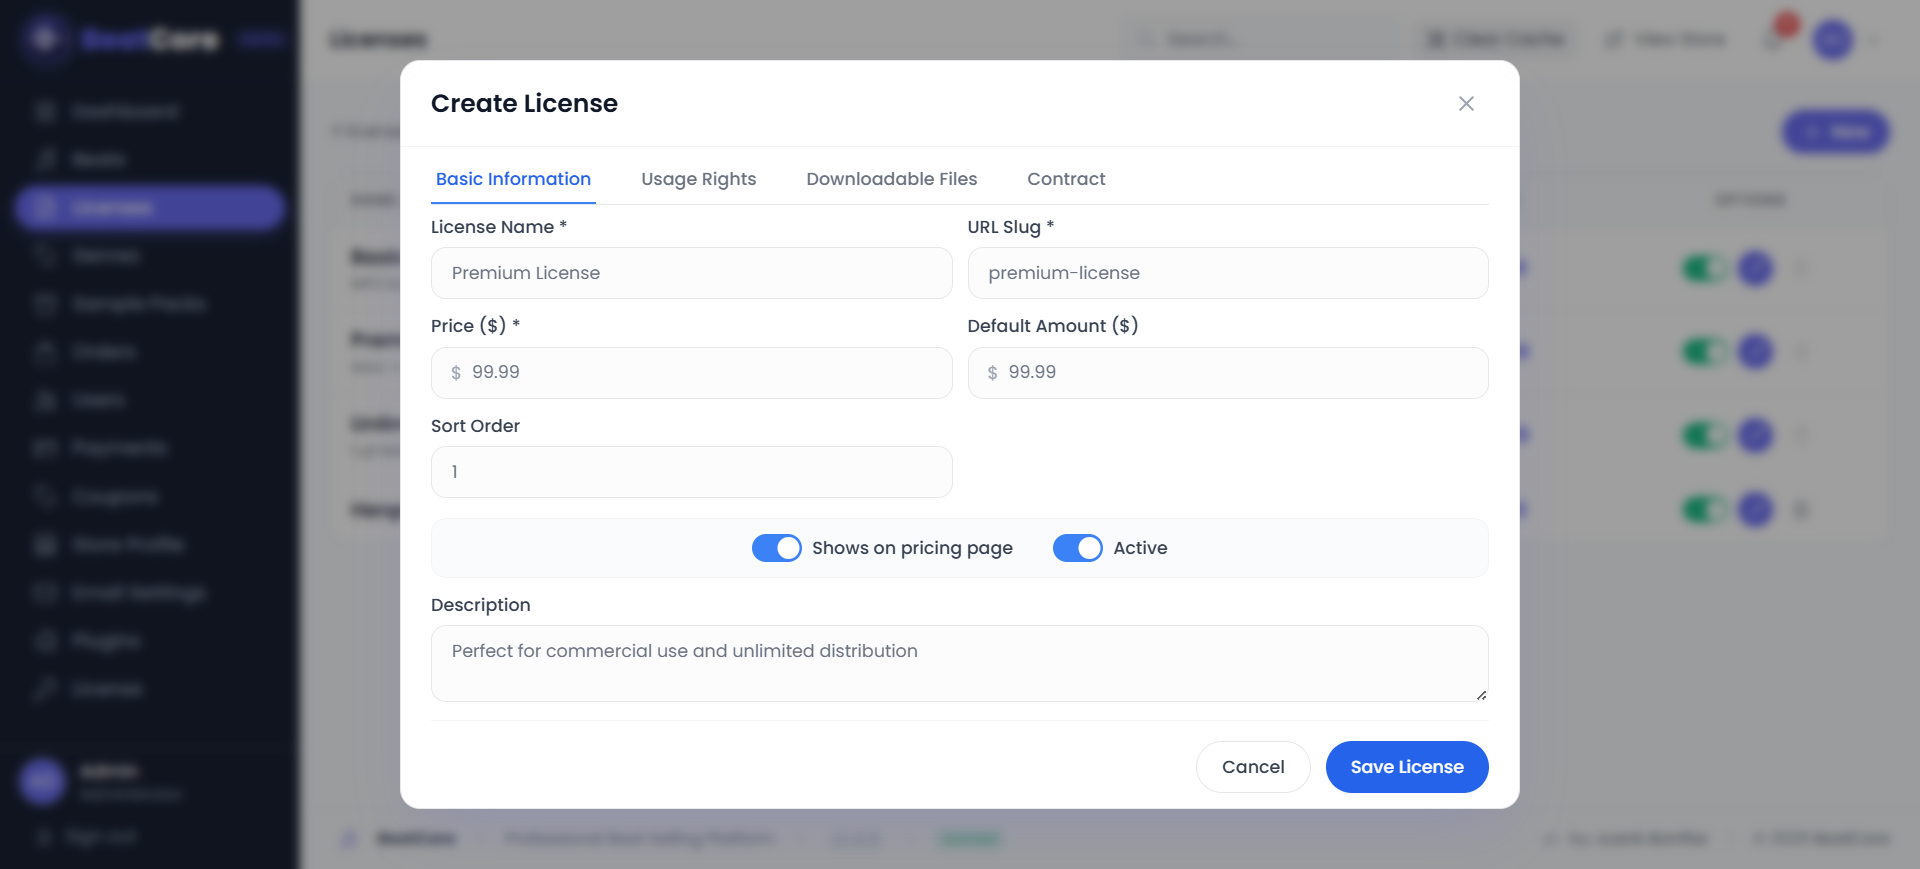
Licenses
Licenses define the pricing tiers for purchasing your beats, including what files the buyer receives and what usage rights they get. Admin Panel → Licenses
These are default prices. When uploading a beat, you can set a different price for each license tier on that specific beat.
Create a custom license tier
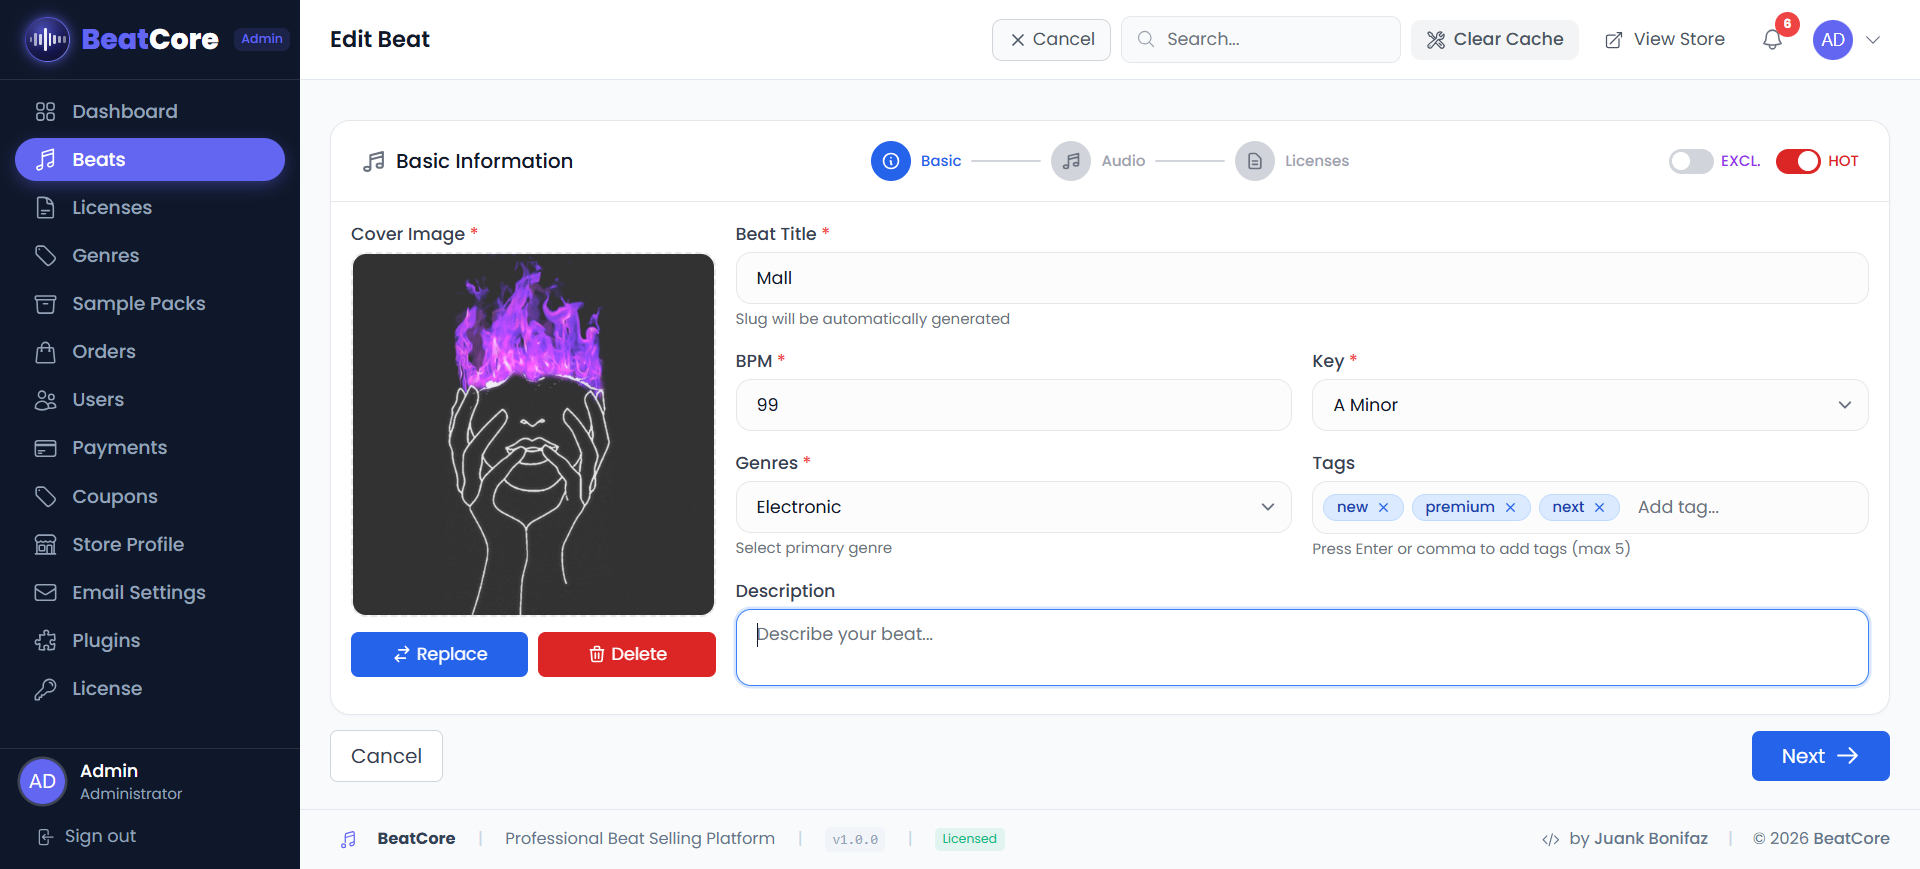
Beats
Beats are your main product. Upload them at Admin Panel → Beats → Add Beat. The upload form has 3 steps.
Step 1 — Basic Info
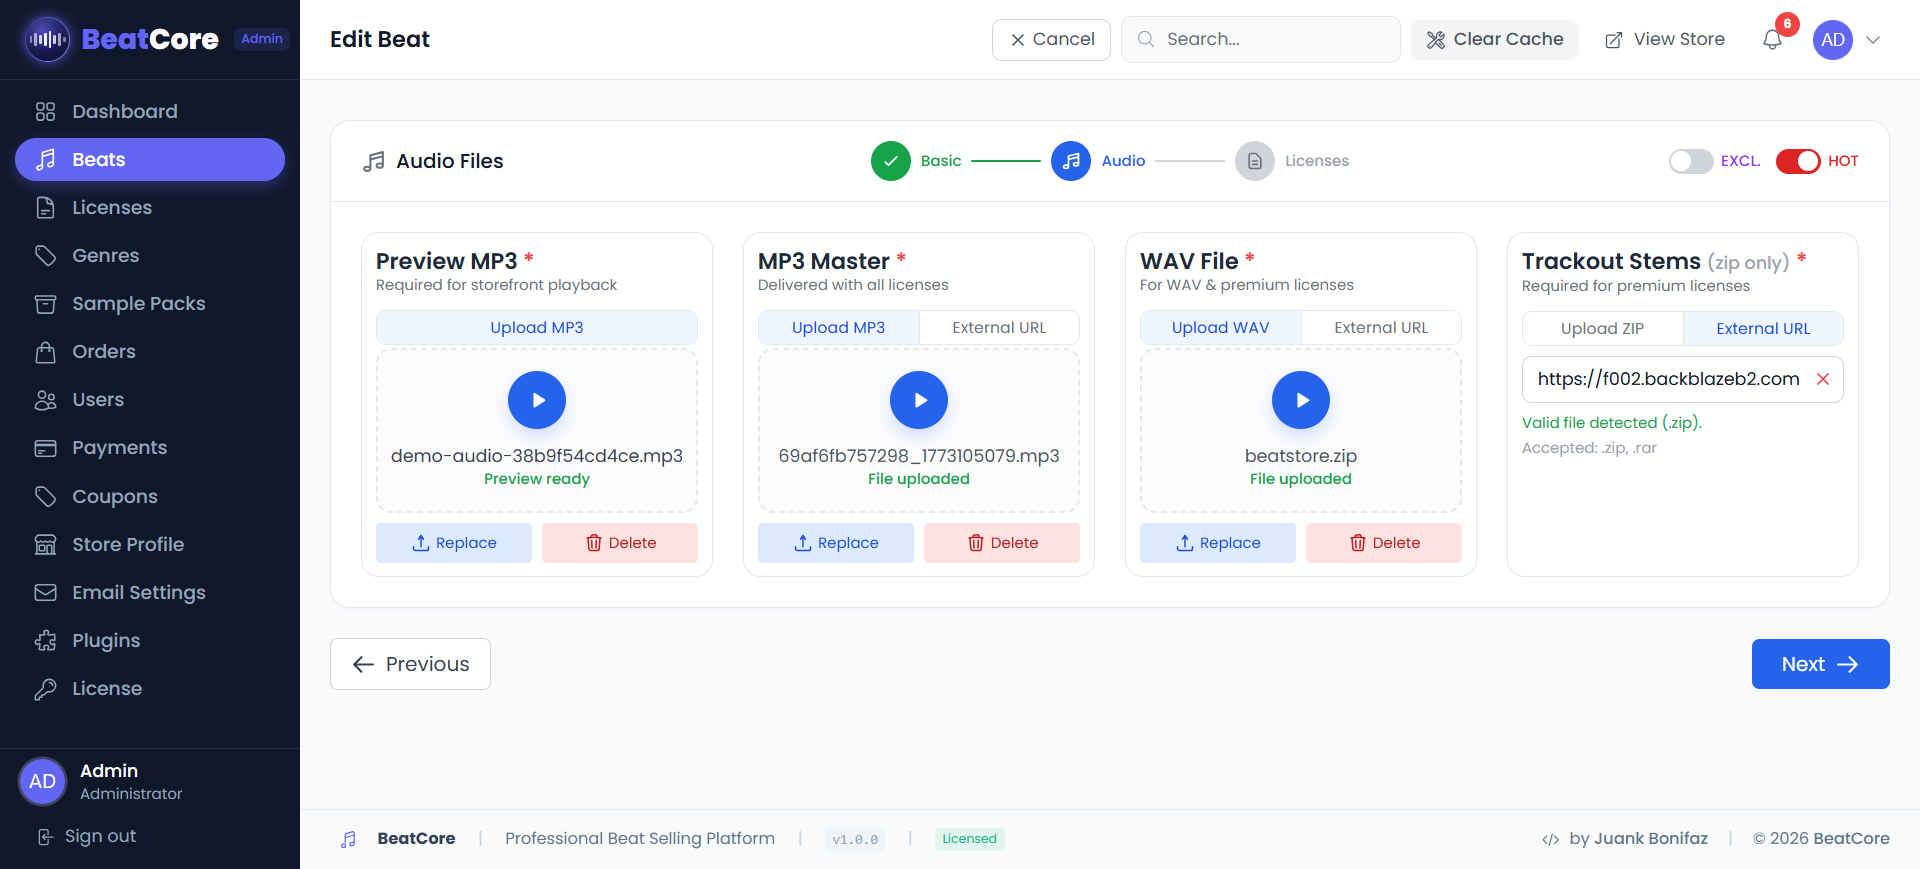
Step 2 — Audio Files
Only the Preview MP3 is public. Full files are locked behind secure, expiring download links generated after purchase.
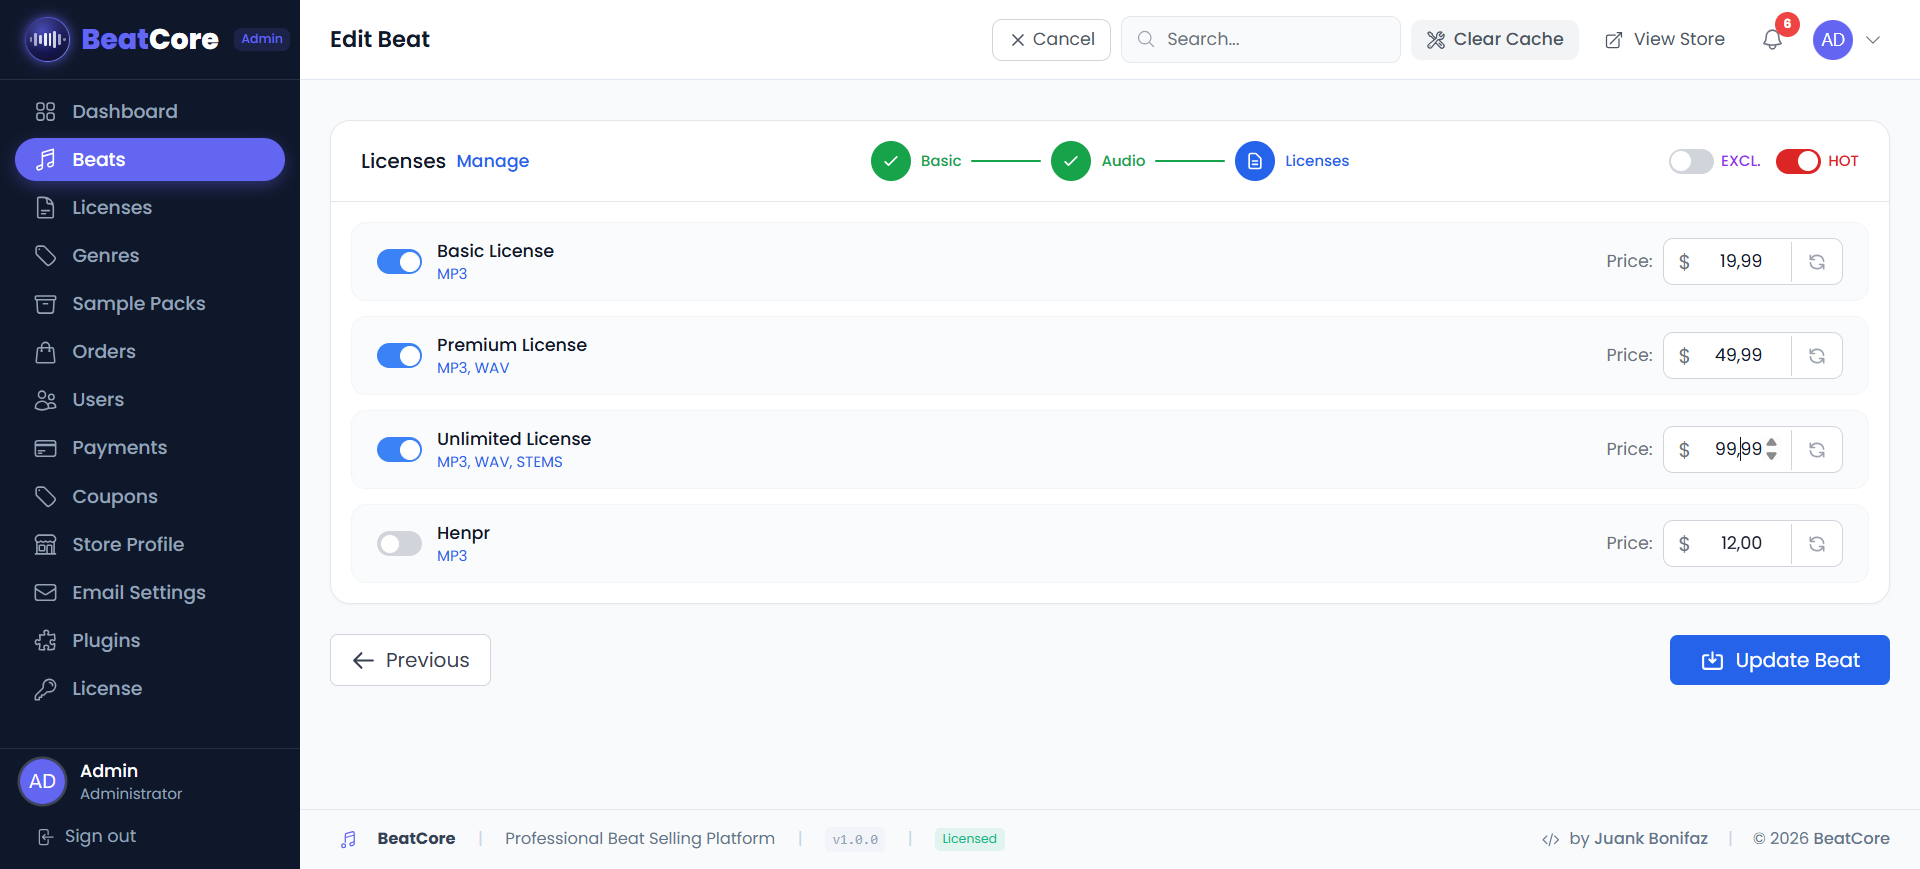
Step 3 — License Pricing
For each license tier, you can leave the price blank (uses global default) or enter a custom price for this specific beat. This is how you charge more for popular beats.
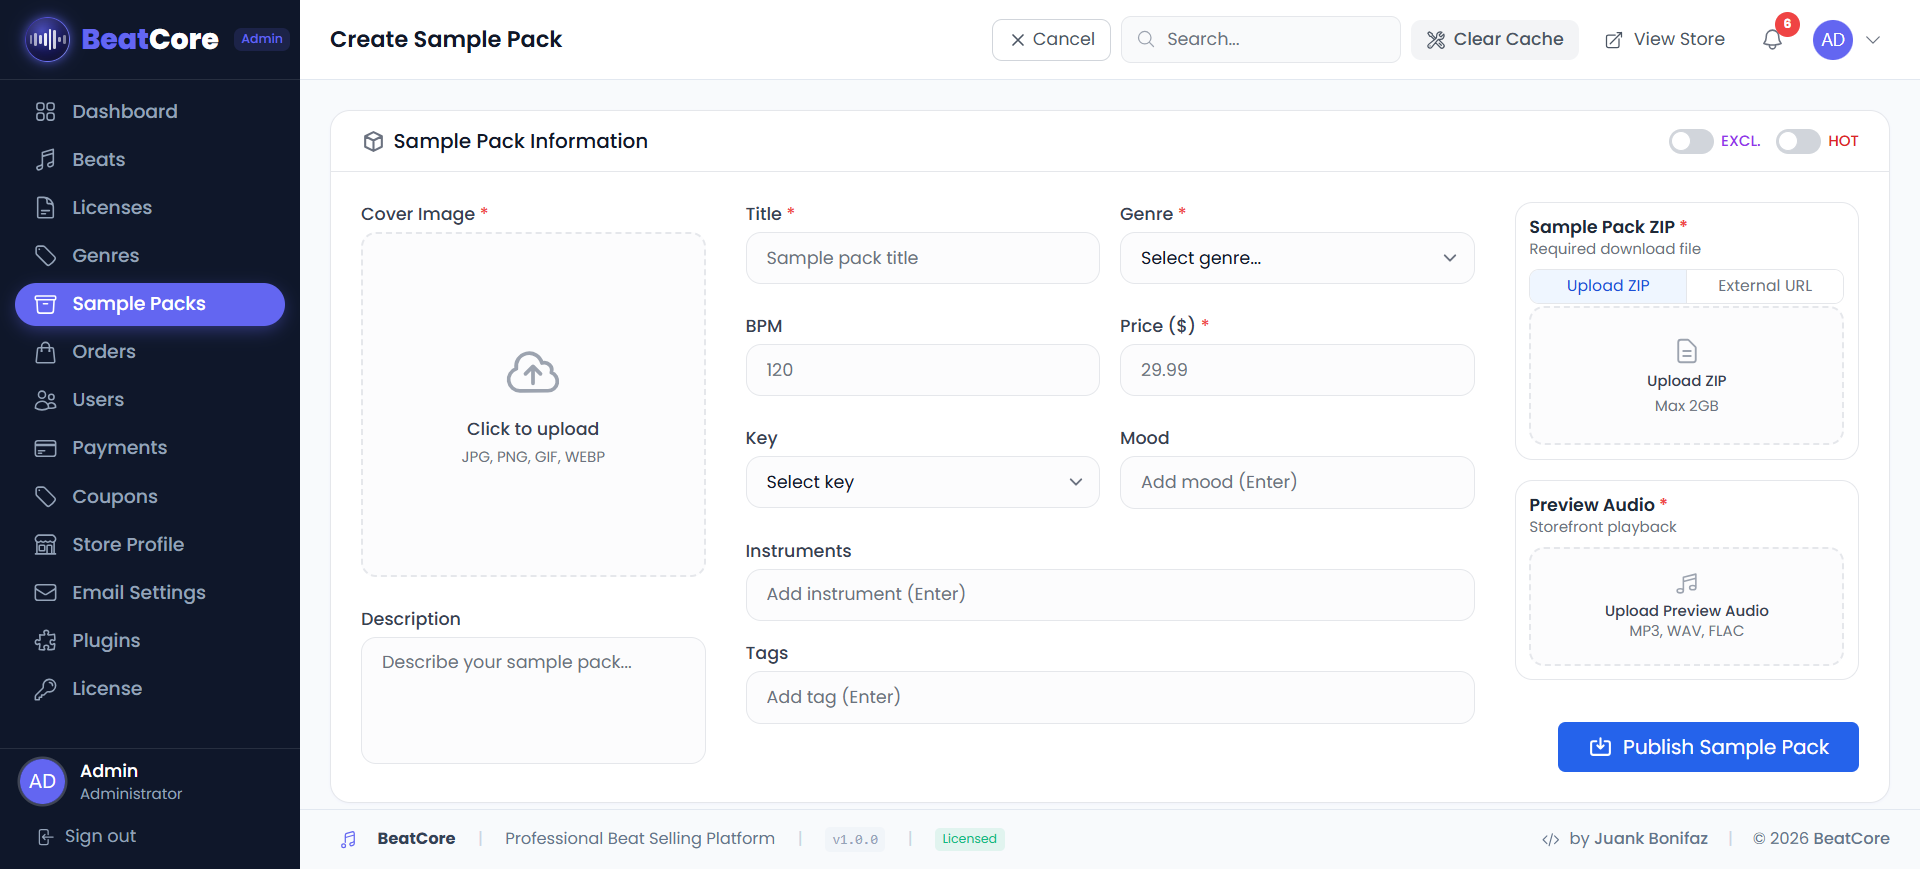
Sample Packs
Sell downloadable ZIP files — drum kits, loop packs, preset banks. Admin Panel → Sample Packs
Coupons
Create discount codes for promotions. Admin Panel → Coupons
SUMMER30 — customers enter this at checkout.Use the Generate Code button when creating a coupon to auto-create a random alphanumeric code.

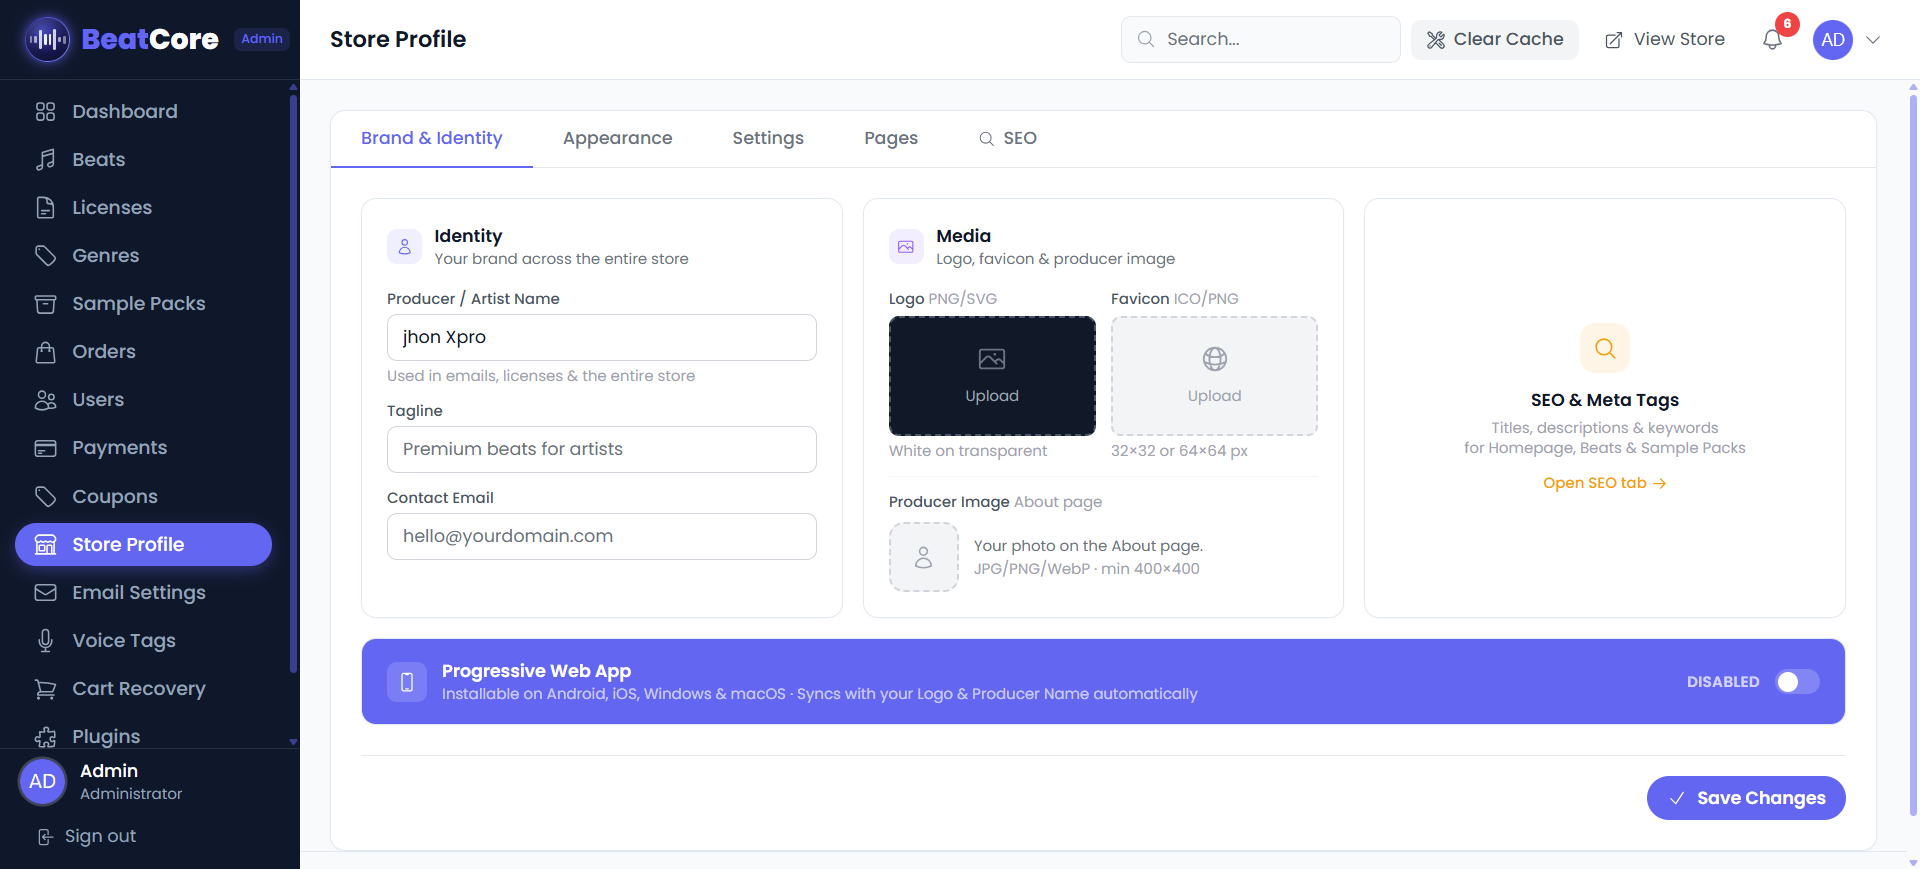
Store Profile
Your central settings hub. Navigate to Admin Panel → Store Profile (/admin/store) to configure your brand, appearance, checkout behavior, page content, and SEO — all in one place across 5 tabs.
Brand & Identity
| Field | Description |
|---|---|
Store Name producer_name | Appears in the page title, header, and purchase emails. Single source of truth — store_name is kept in sync automatically. |
| Tagline | Short phrase displayed under the store name in the hero section. |
| Logo | PNG or SVG recommended. Used in the header. Saving a new logo auto-generates PWA icons at 192×192 and 512×512. |
| Favicon | Icon shown in the browser tab. Accepts PNG, SVG, or ICO. |
| Producer Image | Your photo shown in the About section of the homepage. |
| Contact Email | Displayed in the footer and used as the default Reply-To address on outgoing emails. |
| Phone / Address | Optional contact details shown in the store footer. |
| Social Links | Instagram, YouTube, Twitter/X, Spotify, SoundCloud, TikTok — paste the full profile URL. Icons appear in the footer. |
Appearance
| Field | Default | Description |
|---|---|---|
| Primary Color | #9333ea | Main accent used for buttons, links, and highlights. Accepts any HEX value. |
| Secondary / Accent Colors | #3b82f6 / #ec4899 | Used for hover states, badges, and secondary UI elements. |
| Background Color | #0a0a0a | Page background color. |
| Text Color | #ffffff | Main body text color. |
| Font (Body / Headings) | Poppins | Google Font name used for body text and h1–h3 headings respectively. |
| Default Beats View | Grid | Display layout for the beats catalog: Grid or List. Set independently for desktop and mobile. |
Settings
| Setting | Description |
|---|---|
| Guest Checkout | Allow purchases without an account. Recommended ON — disabling it significantly reduces conversions. |
| Require Registration | Forces buyers to create an account before checkout. Automatically synced when Guest Checkout is toggled. |
| Email Verification | Sends a verification link before buyers can access their download links. |
| Allow Account Deletion | Lets registered users delete their own account from the profile page. |
| Google Login | OAuth sign-in with Google. Requires a Google Cloud client_id and client_secret. |
| Facebook Login | OAuth sign-in with Facebook. Requires a Facebook App client_id and client_secret. |
| Cookie Consent Banner | Shows a GDPR cookie notice to first-time visitors. |
| Visual Text Editor | Enables inline rich-text editing on public-facing pages (About, Terms, etc.). |
| PWA | Turns the store into a Progressive Web App. Configure: app name, short name, description, and theme color. Requires a logo upload to generate icons. |
| Currency / Timezone | Currency code used in prices (e.g. USD) and timezone used for order timestamps. |
| Footer Sections | Show or hide individual footer links: Genres, Pricing, FAQ, Contact, About, Privacy, Terms, Refund Policy, License Info. |
Pages
| Page | Fields |
|---|---|
| About | Title, subtitle, and bio text shown in the homepage About section. |
| FAQ | Section heading and subtitle. Individual Q&A items are managed via Admin → FAQs. |
| Terms of Service | Title and body content served at /terms. |
| Privacy Policy | Title and body content served at /privacy. |
| Refund Policy | Title and body content served at /refund. |
SEO
Controls how your storefront appears in Google search results. A live SERP preview updates as you type. Breadcrumb structured data is injected automatically on all pages.
Google uses title (≤ 60 chars) and description (≤ 160 chars) in search results. Keeping both inside the limit prevents truncation or rewriting.
| Field | Limit | Description |
|---|---|---|
| Meta Title | 60 chars | The clickable headline in Google results. Empty → defaults to Store Name — Tagline. |
| Meta Description | 160 chars | The snippet shown below the title in search results. Write a natural sentence with your main keywords. |
| Keywords | — | Site-wide fallback keywords. Add by pressing Enter or ,. Used as a meta keyword fallback across all pages. |
| Beats Catalog — Description | 160 chars | Custom meta description for /beats, shown when buyers find your catalog on Google. |
| Beats Catalog — Keywords | — | Keywords specific to /beats. |
| Sample Packs — Description | 160 chars | Meta description for /sample-packs. |
| Sample Packs — Keywords | — | Keywords specific to /sample-packs. |
Checkout
Configure checkout behavior from Admin Panel → Settings → Checkout.
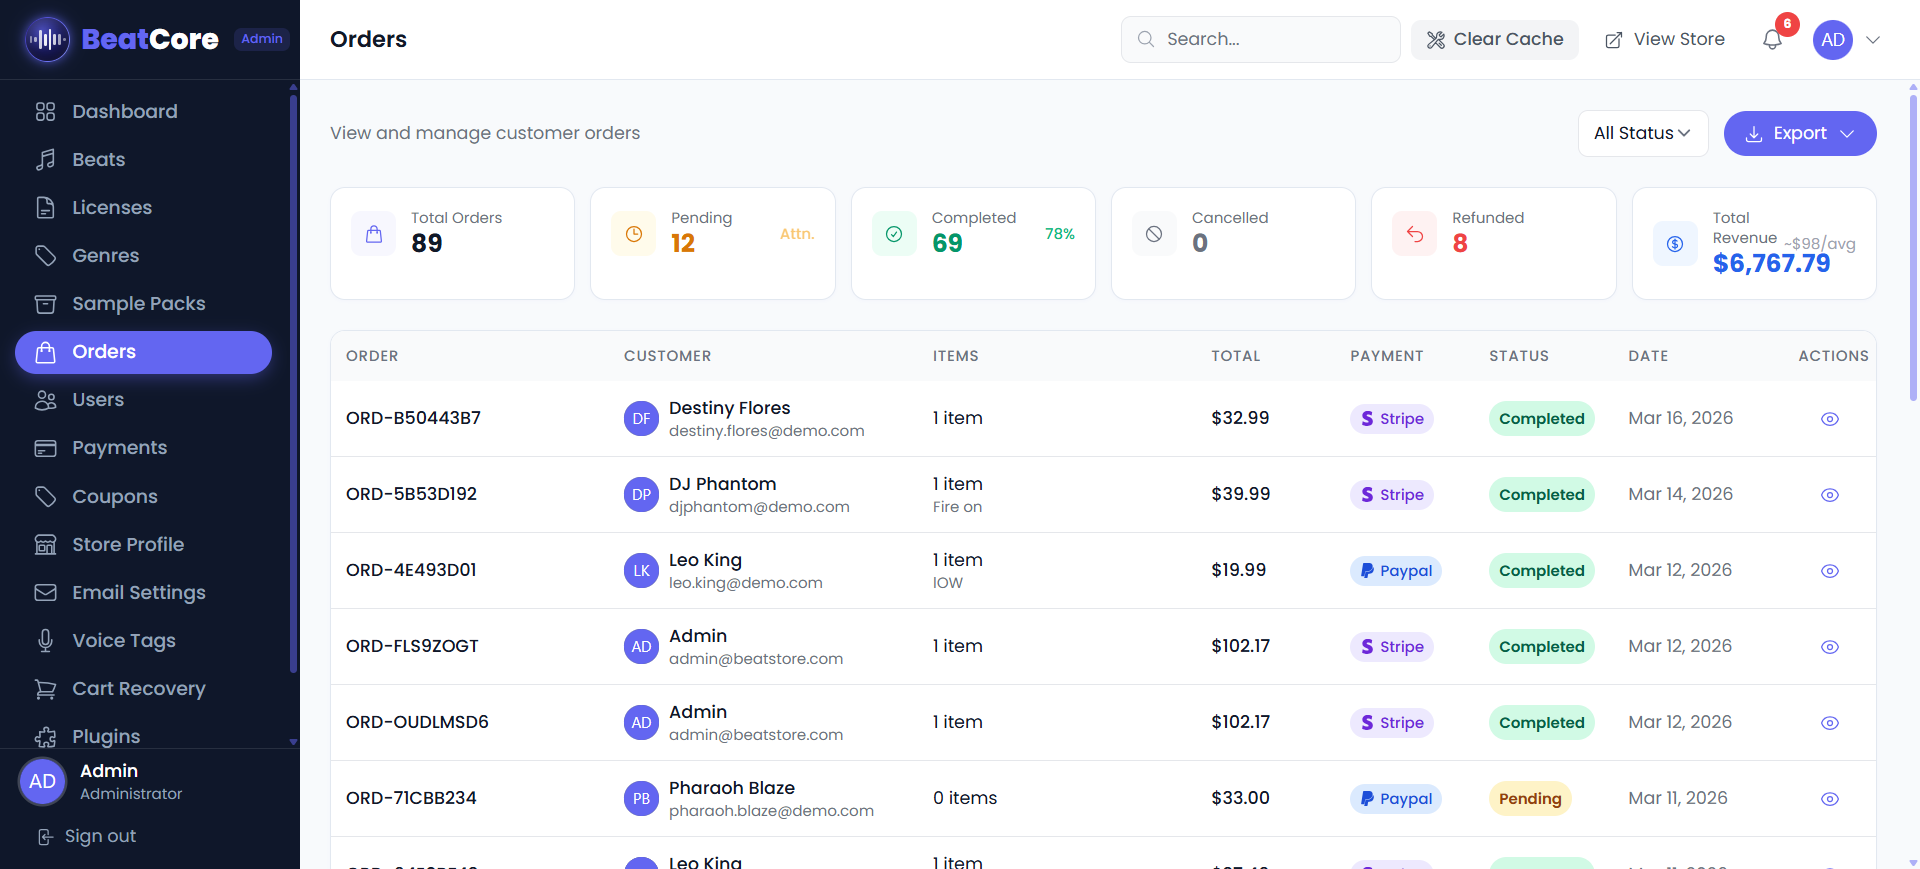
Orders
View and manage all purchases at Admin Panel → Orders.
Key actions
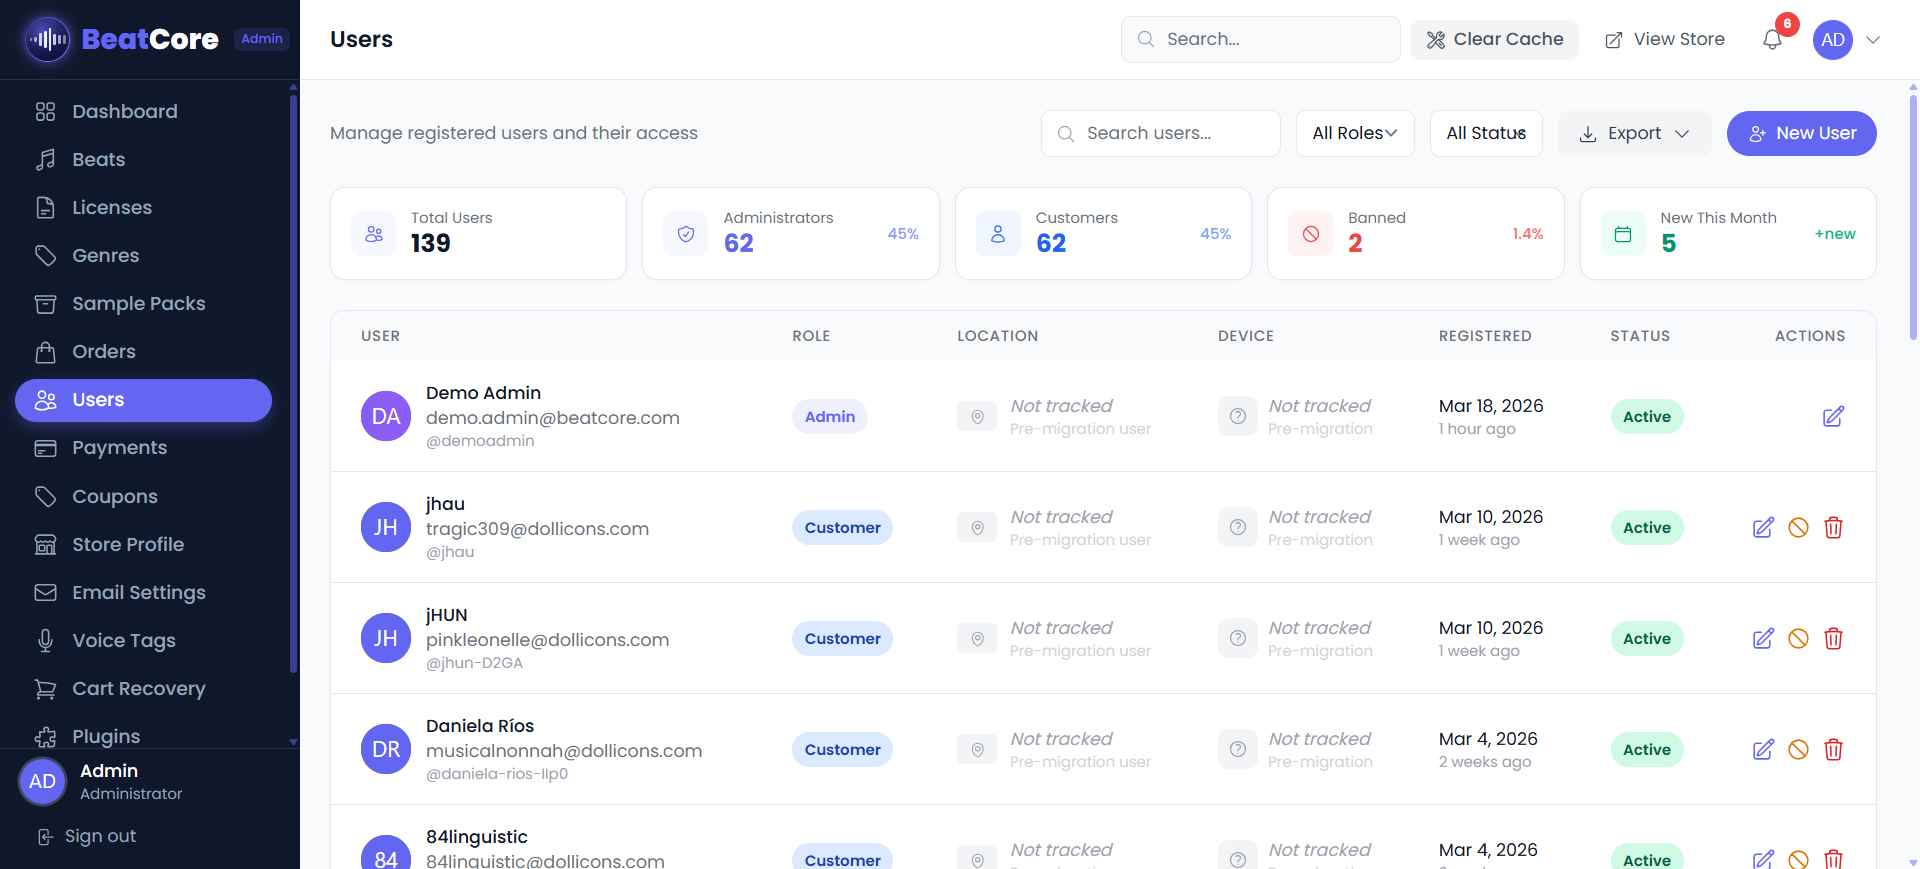
Users
Manage registered customers from Admin Panel → Users.
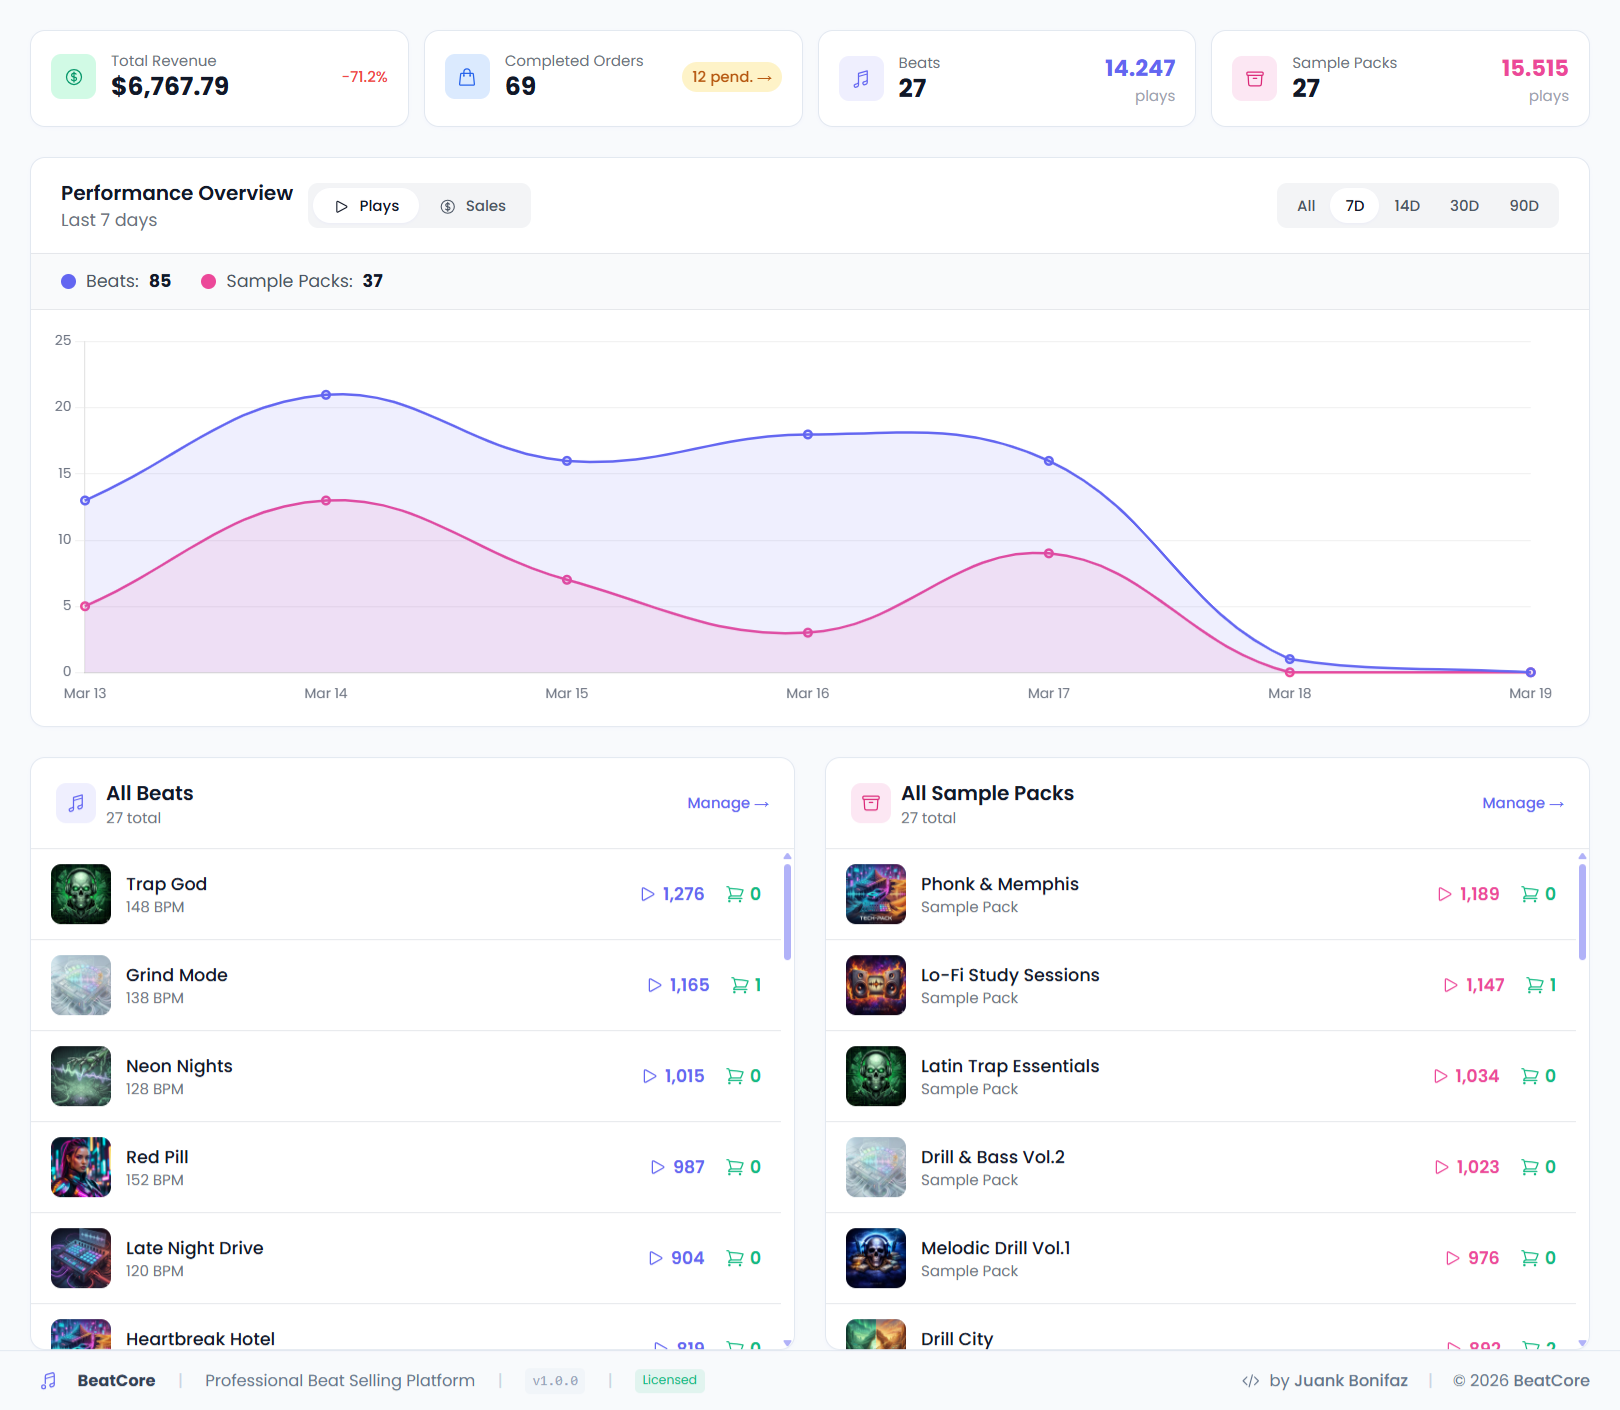
Dashboard
Your overview at a glance. Admin Panel → Dashboard shows the health of your store.
Admin Panel Reference
All admin sections and what they do.
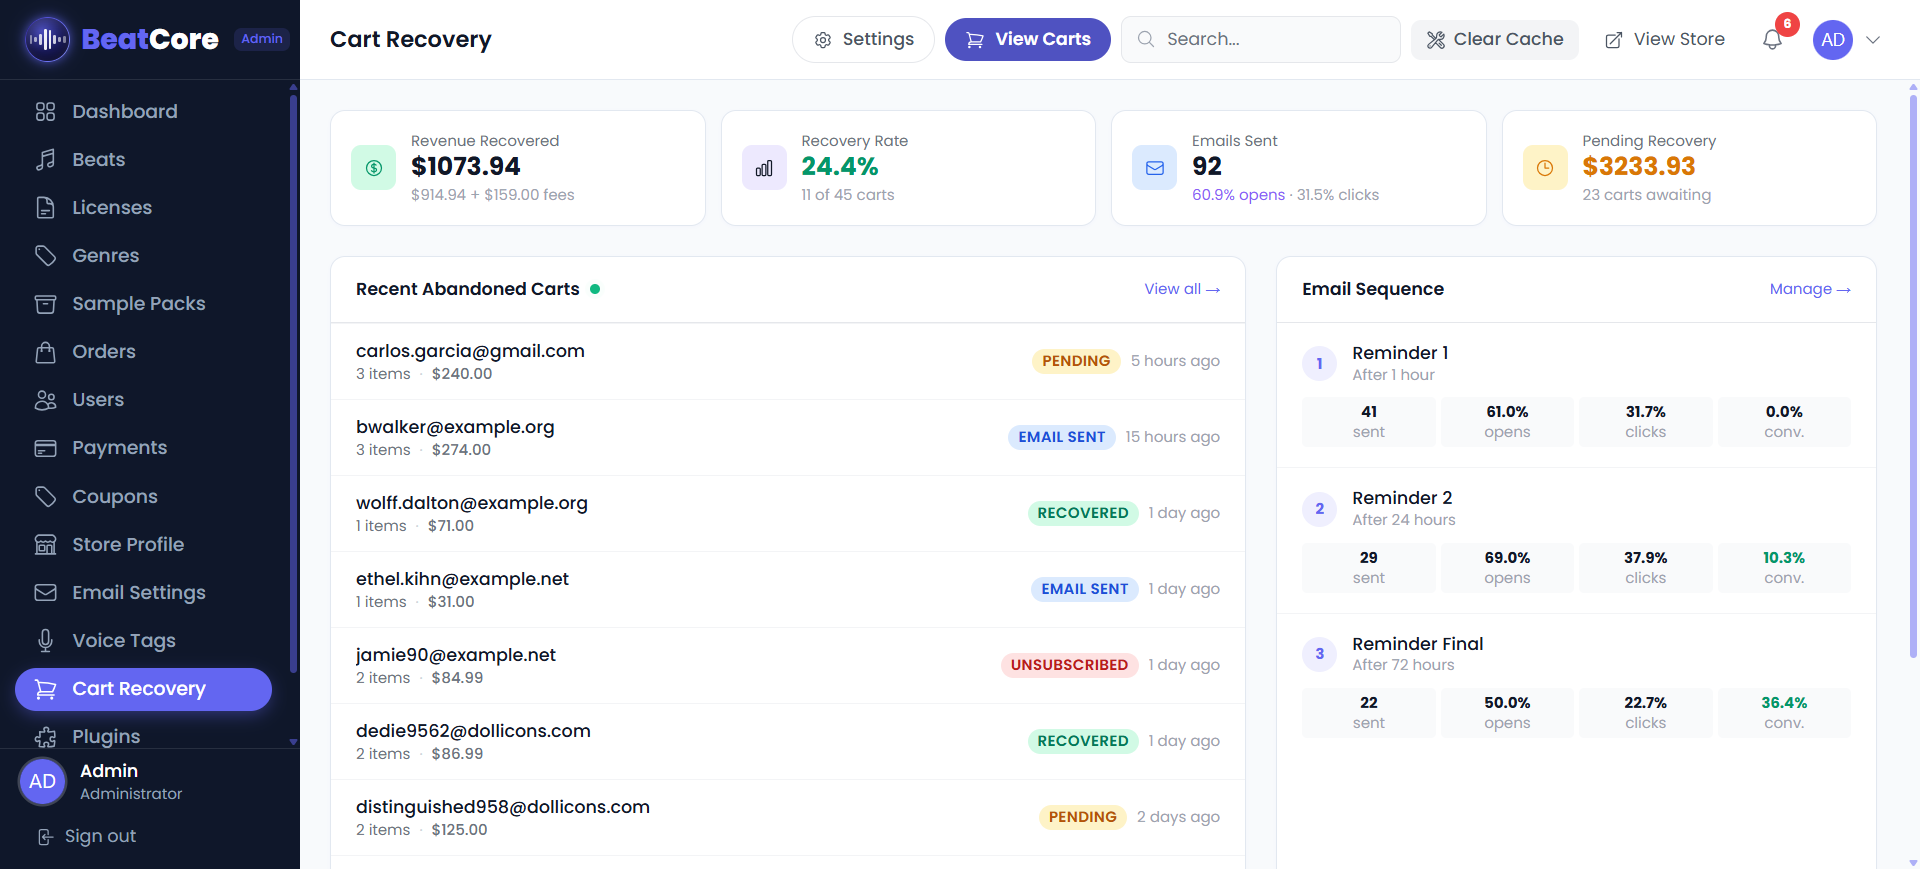
Cart Recovery Plugin
This is an optional paid plugin. Install it from Admin Panel → Plugins by uploading the plugin ZIP file.
Cart Recovery automatically emails customers who added beats to their cart but didn't complete the purchase. It waits a configurable amount of time, then sends a reminder with a direct link back to the cart.
Install
cart-recovery.zip file you received with your purchase.Settings
| Setting | Description |
|---|---|
| Enable Plugin | Master ON/OFF switch |
| Delay (minutes) | How long to wait after cart abandonment before sending the email. Default: 60 minutes. |
| Email Subject | Subject line of the recovery email. Supports {{store_name}} placeholder. |
| Email Body | HTML or text body. Supports {{customer_name}}, {{cart_url}}, {{cart_items}} placeholders. |
Use the Send Test Email button to preview the recovery email before it goes live. Make sure SMTP is configured first.
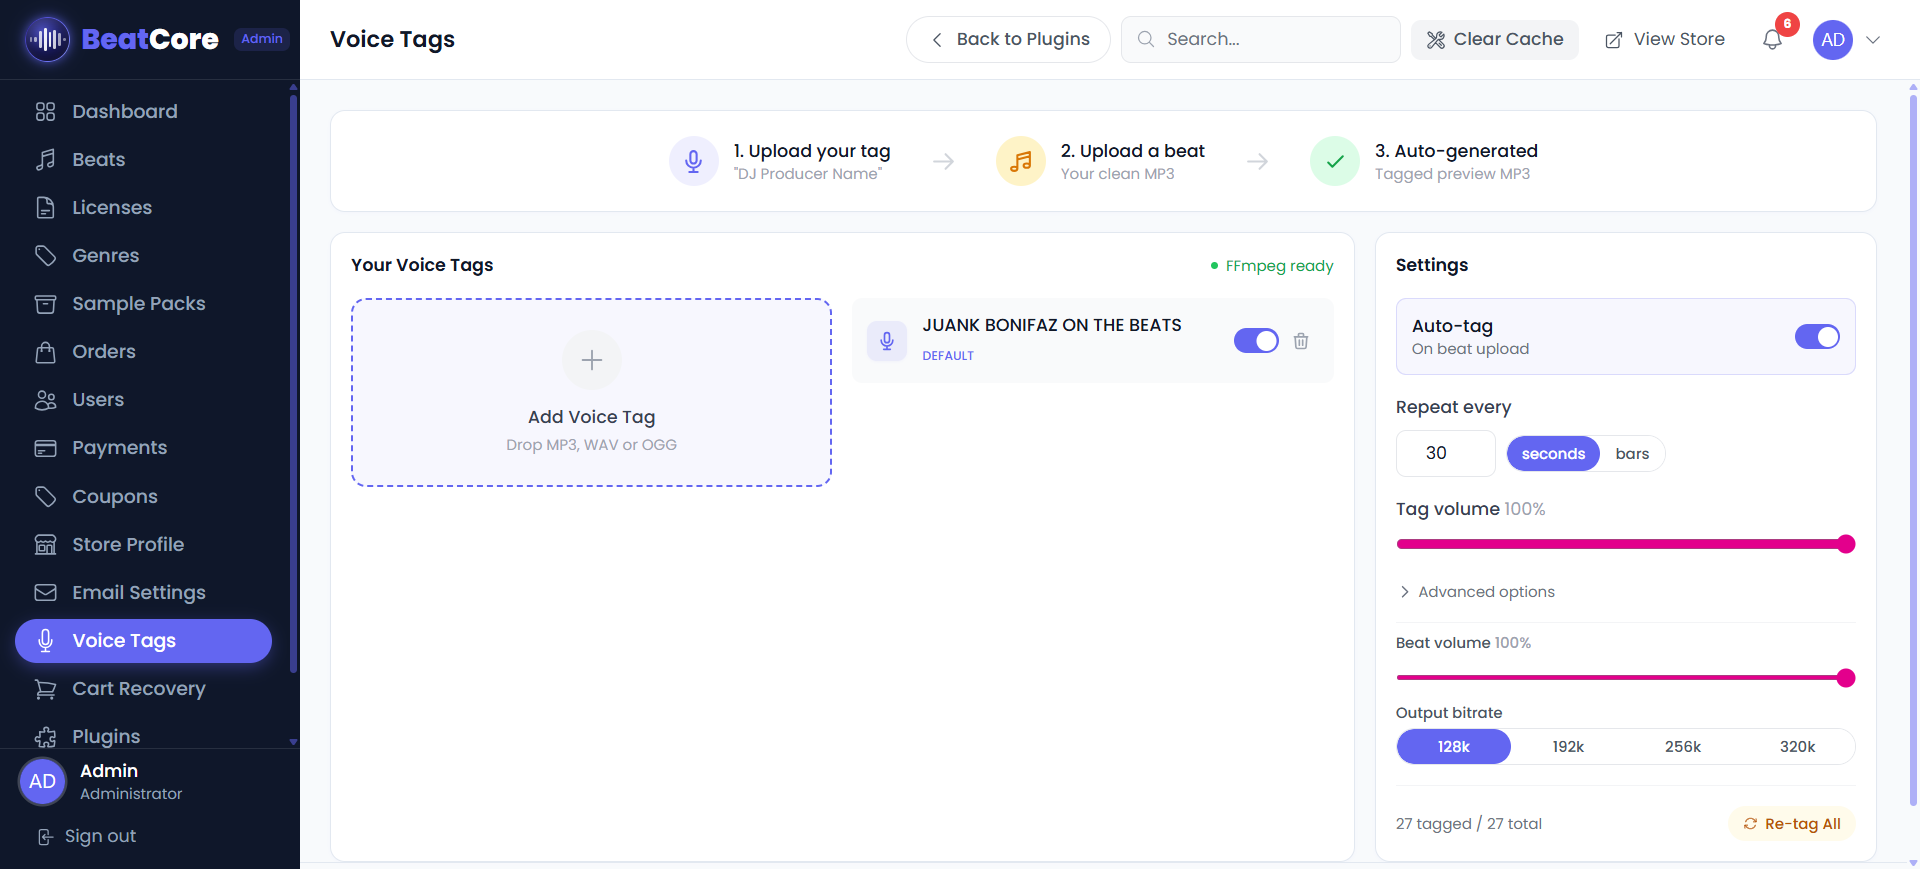
Voice Tag Plugin
This is an optional paid plugin. Install it from Admin Panel → Plugins by uploading the plugin ZIP file.
Voice Tag automatically overlays an audio tag (e.g. "Produced by YourName") on beat preview files. This brand-protects your work so customers can't use untagged previews without purchasing.
Requirements
FFmpeg must be installed on your server. Voice Tag uses FFmpeg to mix audio. Most VPS providers support this. Shared hosting may not. Contact your host and ask: "Can I install FFmpeg via PHP exec()?"
Install
voice-tag.zip and click Activate.Settings
| Setting | Description |
|---|---|
| Tag Audio File | Your voice tag MP3 (e.g. "Produced by BeatMaker") |
| Tag Volume | Volume of the tag relative to the beat (0–100) |
| Placement | Beginning / End / Every N seconds / Random |
| Apply to New Beats | Automatically tags any newly uploaded beat preview |
exec() with FFmpeg. For help email beatstore.lab@gmail.com.
Social Login
Allow customers to sign in using Google or Facebook instead of creating a password. Configured in Admin Panel → Store Profile → Settings tab.
Google OAuth
console.cloud.google.com, create a project, and enable the Google+ API.https://yourdomain.com/auth/google/callbackFacebook Login works the same way. Create a Facebook App at
developers.facebook.com, add "Facebook Login" product, and paste the App ID and Secret into BeatCore.